
Not everyone has room for a compost pile.
Maybe you live in an apartment, or your yard is small and shady.
You may still want a way to turn kitchen scraps into something useful for your plants.
Worm composting is a quiet, tidy answer.
It is also called vermicomposting.
A small bin of special worms eats fruit and vegetable scraps and turns them into dark, crumbly worm castings.
The bin can live under a sink, in a closet, or on a shaded porch.
Kept well, it does not smell and does not attract pests.
This guide follows the steps published by the Environmental Protection Agency in its guide to composting at home.
We add a few calm tips to make the first months easy.
Why Worm Composting Is Worth It
- It takes very little space and can be done indoors or outdoors.
- The supplies are simple and inexpensive.
- It keeps food scraps out of the trash.
- The finished vermicompost does not need extra time to cure.
- It gives you a steady, small supply of soil amendment for pots and beds.
It is also a gentle routine.
Feeding the bin takes a few minutes a week, and the worms do the rest.
Step 1: Get or Make a Worm Bin
You can buy a worm bin, or make one from untreated wood or plastic storage bins.
The EPA recommends a bin with a tight-fitting lid in a dark color.
Worms prefer darkness.
A simple two-bin setup works well:
- Take two plastic storage bins of the same size.
- In one bin, drill small air holes around the upper sides near the lid.
- Drill a few drainage holes in the bottom of that same bin.
- Place the drilled bin inside the second, undrilled bin.
- The bottom bin catches any liquid that drains out.
A small spacer, like a couple of jar lids, between the two bins helps air and liquid move.
Step 2: Choose a Good Spot
Indoors, a bin fits well under a sink, in a closet, or in a basement.
Outdoors, choose a shaded spot such as a garage, a porch, or a balcony.
Temperature matters most.
The EPA suggests keeping the bin between 59 and 77 degrees Fahrenheit.
Worms can survive from 32 to 95 degrees if they have at least four inches of bedding.
They will be much less active near those limits.
If your bin is outdoors, insulate it in cold months.
Blankets or straw around the bin work well.
Keep it out of direct summer sun.
Step 3: Prepare the Bedding
Bedding is the home your worms live in.
It also balances the wet food scraps.
Good bedding materials include:
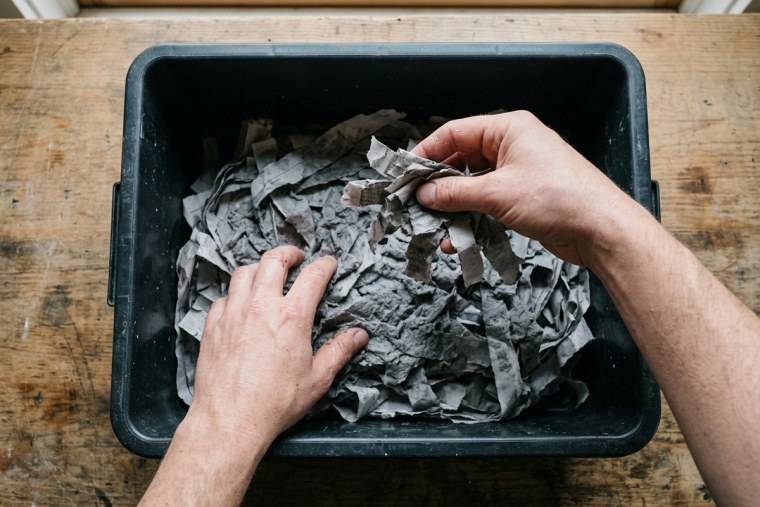
- Non-glossy newspaper, shredded or torn into strips.
- Plain office paper.
- Cardboard, torn into small pieces.
- Dry leaves.
Soak the bedding in water for about ten minutes.
Wring it out until it feels like a damp sponge.
Fluff it into the bin until the bin is almost half full.
Then add a handful of soil.
Step 4: Get the Right Worms
This is the step beginners most often get wrong.
The EPA notes that only seven of the roughly 9,000 earthworm species are suitable for worm bins.
One of the most common is the red wiggler, Eisenia fetida.
Do not use worms from your garden or from a bait shop.
Garden earthworms live deep in the soil and will not thrive in a bin.
Start with about one pound of worms.
That is roughly 1,000 worms.
Buy them from a worm grower, or ask a neighbor who already keeps a bin.
Step 5: Feed Your Worms Gently
Place the worms on top of the bedding.
Let them settle and burrow down before you add food.
Good foods for worms include:
- Most fruit and vegetable scraps.
- Coffee grounds and paper coffee filters.
- Crushed eggshells.
- Paper tea bags without staples.
Foods to keep out of the bin:
- Citrus fruits.
- Strong-smelling foods such as onions and garlic.
- Meat, bones, and dairy products.
- Greasy or oily foods.
- Pet waste.
Chop scraps into small pieces so they break down faster.
Each time you add food, cover it with about two inches of bedding.
Covering food keeps fruit flies and odors away.
According to the EPA, worms eat about a quarter of their body weight each day.
Start with small amounts.
Always check that the last meal is mostly gone before adding more.
As the worms multiply, you can slowly feed a little more.
A Simple Weekly Routine
- Collect scraps in a small, lidded container in the kitchen or fridge.
- Once or twice a week, lift the bedding and check the last feeding.
- Bury the new scraps in a different corner each time.
- Cover them with two inches of damp bedding.
- Feel the bedding. It should stay as damp as a wrung-out sponge.
- Add fresh, moistened bedding as the old bedding breaks down.
Fixing Common Problems
- Bad smell. Usually too much food or bedding that is too wet. Stop feeding for a week and add dry shredded paper.
- Fruit flies. Food is not fully covered. Bury scraps deeper and keep the lid on.
- Worms crowding at the lid. The bin may be too wet, too hot, or too acidic. Add dry bedding and skip citrus.
- Bedding too dry. Mist it with water until it feels damp again.
- Slow activity in winter. The bin is probably too cold. Move it indoors or insulate it.
A well-kept bin should smell like fresh, damp soil.
If it does not, the fix is almost always less food and more dry bedding.
Step 6: Harvest the Vermicompost
After about three to six months, you will see dark, crumbly castings at the bottom of the bin.
This is your vermicompost.
One gentle way to harvest is to feed only on one side of the bin for a couple of weeks.
Most worms will move toward the food.
You can then scoop finished castings from the other side.
Return any worms you find to the bin.
Refresh the bedding, and the cycle starts again.
The EPA notes that vermicompost does not need to cure.
You can use it right away or store it for later.
How to Use Your Vermicompost
Finished compost can go into flower and vegetable beds, window boxes, and container gardens.
You can also mix it into potting soil for indoor plants.
As a soil amendment, the EPA suggests mixing two to four inches of compost into the top six to nine inches of soil.
For containers, a smaller amount mixed into fresh potting mix is plenty.
Worm castings are rich, so a little goes a long way.
If you also have a yard, a worm bin pairs well with an outdoor pile.
Our guide to starting a backyard compost pile covers that method.
The EPA page on approaches to composting compares the main options.
A Calm Way to Start
Begin small.
One bin, one pound of worms, and a few scraps a week are enough to learn the rhythm.
In a few months you will have your first batch of rich, dark compost.
You will also have a quiet routine that turns kitchen leftovers into something your plants love.
Sources and Further Reading
- US Environmental Protection Agency — Composting At Home: supports the worm bin setup, bedding preparation, temperature range, suitable worm species, starting amount, foods to add and avoid, feeding rate, harvest time, and how to use compost in soil.
- US Environmental Protection Agency — Approaches to Composting: an overview of the main composting methods, including vermicomposting.