
There is something quietly hopeful about a tray of seeds on a late winter evening.
Outside, the garden is still bare. Inside, tiny green loops are pushing up through the soil.
Starting your own vegetable seeds indoors is easier than many people think.
It needs a little space, a simple light, and a steady routine.
In return you get a wider choice of varieties and healthy transplants that cost very little.
You also get to watch a plant grow from seed all the way to harvest.
This guide follows the starting seeds indoors fact sheet from Clemson Cooperative Extension.
We add a few calm, practical habits that help a first attempt go well.
Which Vegetables to Start Indoors
Not every crop likes to be moved.
Clemson Extension lists broccoli, cabbage, kale, tomatoes, peppers, eggplant, lettuce, and onions as easy to transplant.
Beans, corn, and carrots do poorly as transplants.
Sow those directly into the garden instead.
For a first season, pick two or three crops you really love to eat.
Tomatoes, peppers, and lettuce make a friendly starting trio.
Buy seed from a reputable seller.
Look for varieties suited to your region, with resistance to common diseases where possible.
What You Need
- A bag of seed starting mix, labeled for seeds.
- Cell trays, small pots, or clean household containers with drainage holes.
- A clear plastic dome or plastic wrap to hold in moisture.
- A simple fluorescent or LED shop light that can be raised.
- An outlet timer for the light.
- A small fan.
- A water-soluble starter fertilizer.
- Plant labels and a marker.
Clemson Extension notes that yogurt cups, cut-down milk cartons, and similar containers work well.
Just punch a hole in the bottom of each one for drainage.
Step 1: Use a Clean Seed Starting Mix
This is the step that prevents the most heartbreak.
Seeds need a light, well-drained, sterile, soilless mix.
Clemson Extension explains that soilless mixes reduce damping-off.
Damping-off is a disease that makes young seedlings collapse at the soil line.
Avoid bagged topsoil, garden soil, vegetable garden mixes, and regular potting mix for this stage.
Moisten the mix before filling your containers.
It should feel like a wrung-out sponge, damp but not dripping.
Step 2: Choose a One-Step or Two-Step Method
There are two simple ways to grow transplants from seed.
The one-step method
Sow seeds directly into the container where the seedling will grow until planting time.
Peat pots, peat pellets, and multi-cell trays all work.
This method avoids moving tiny seedlings, which makes it calm and simple.
The two-step method
Sow many seeds together in a shallow flat.
When one or two sets of true leaves appear, move each seedling into its own larger container.
Hold the seedling by a seed leaf, never by the stem.
Clemson Extension warns that the stem is fragile and the slightest injury can cause lasting damage.
The seed leaves are the first two simple leaves that open, before the true leaves arrive.
Step 3: Sow and Cover
Check the seed packet for planting depth.
A common rule is to sow seeds about two to three times as deep as they are wide.
Very tiny seeds, like lettuce, need only a light dusting of mix on top.
Label every row or container with the variety and the date.
Then cover the tray with a clear dome or plastic wrap.
Seeds are very sensitive to drying out while they germinate.
Clemson Extension suggests covering them to hold moisture until all the seeds have sprouted.
Remove the cover as soon as the seedlings appear, so air can move around them.
Step 4: Give Them Plenty of Close Light
Light is where many first attempts go wrong.
Seedlings on a windowsill tend to stretch toward the glass.
They grow tall, thin, and weak, and they often topple over.
Clemson Extension recommends 16 to 18 hours of bright light each day for stocky seedlings.
A shop light with fluorescent tubes on a timer is an adequate home setup.
The key is distance.
Keep the light about two to four inches above the tops of the seedlings.
Raise the light as the seedlings grow, keeping that small gap.
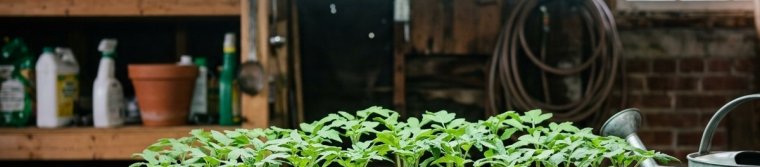
Aluminum foil hung around the fixture can reflect extra light back onto the plants.
Set the timer once, and the light routine takes care of itself.
Step 5: Water From Below When You Can
Seedlings need steady moisture, but not soggy soil.
Clemson Extension suggests watering when the seedlings are just slightly wilting.
Stop when water runs out of the bottom of the container.
Bottom watering is gentle and easy.
Fill a tray or lid with one to two inches of water.
Set the seedling tray in it for three to ten minutes, then lift it out.
Larger cells may look dry on top while still holding water below.
Lift the tray now and then to feel its weight before you water again.
Avoid extra watering while plants are small, or if green algae appear on the surface.
Step 6: Feed Gently
Seed starting mixes hold very few nutrients.
Clemson Extension recommends starting to feed when the first true leaves appear.
Use a water-soluble starter fertilizer at every other watering.
Water with plain water in between.
This keeps salts from building up in the mix.
Always follow the rate on the label. More fertilizer is not better for young roots.
Step 7: Add a Gentle Breeze
Outdoor plants sway in the wind, and that movement makes stems stronger.
Clemson Extension suggests placing a small fan near the seedlings once they have two true leaves.
Aim for a gentle sway, not a strong blast.
The moving air also dries the mix a little faster.
Check the moisture more often once the fan is running.
Step 8: Harden Off Before Planting Out
Seedlings raised indoors are not ready for full sun and wind on day one.
They need a slow introduction called hardening off.
Clemson Extension suggests starting once plants are about three inches tall.
Set them outside in a sheltered spot during the day.
Bring them back in before sundown.
Give them a little more direct sun each day.
Continue this routine for two to three weeks.
Growth may slow down for a while. That is normal and helps the plants adapt.
When the day comes, transplant on a cool, cloudy day if you can.
That reduces transplant shock.
How Early to Start
Each crop needs a different amount of time indoors.
Clemson Extension gives approximate times from seeding to transplanting:
- Squash, cucumbers, and melons: about three to five weeks.
- Broccoli, cabbage, cauliflower, collards, and kale: about five to seven weeks.
- Lettuce: about five to seven weeks.
- Tomatoes and eggplant: about six to eight weeks.
- Peppers: about eight to ten weeks.
Count backward from your usual outdoor planting date to find your sowing date.
Clemson's guide to planning a garden explains cool-season and warm-season crops.
Warm-season crops should not go outside until the danger of frost has passed.
Your local Cooperative Extension office can share typical frost dates for your area.
Common Problems and Calm Fixes
- Tall, floppy seedlings. The light is too far away or too weak. Lower it to two to four inches above the plants.
- Seedlings collapsing at the base. This is often damping-off. Start the next batch in fresh seed starting mix and clean containers.
- Green film on the mix. The surface stays too wet. Water less often and add gentle airflow.
- Pale, slow seedlings after true leaves appear. They may need their gentle feeding routine.
- Leaves scorched after moving outside. Hardening off went too fast. Slow down and add shade for a few days.
A Simple Seed Starting Checklist
- Use fresh seed starting mix, not garden soil.
- Cover trays until seeds sprout, then uncover.
- Give 16 to 18 hours of light, two to four inches above the plants.
- Water when slightly wilted, from below when possible.
- Feed at every other watering once true leaves appear.
- Run a gentle fan after two true leaves.
- Harden off for two to three weeks before planting.
A Calm Way to Begin
One tray under one light is plenty for a first year.
You will learn the rhythm of watering, lifting the light, and watching new leaves unfold.
By planting day, your seedlings will be ready for the garden.
If you are short on ground space, our guide to growing vegetables in containers shows where they can go next.
A raised garden bed is another calm home for your new transplants.
Sources and Further Reading
- Clemson Cooperative Extension, Home and Garden Information Center — Starting Seeds Indoors: supports which crops transplant well, the soilless mix and damping-off, the one-step and two-step methods, light hours and distance, watering, feeding, the fan, hardening off, and the seeding-to-transplant times.
- Clemson Cooperative Extension — Planning a Garden: supports cool-season and warm-season crops and waiting until frost danger has passed for warm-season plants.