
If you have ever stood in front of a houseplant with a watering can, wondering whether it really needs a drink, you are not alone.
Watering is the part of plant care that worries beginners the most, and it is also where most plants run into trouble.
The good news is that you do not need a special gadget or a complicated chart. You need a simple routine and a few minutes of attention.
This guide walks you through that routine step by step.
It is written for people who want their plants to look healthy without turning plant care into a second job.
Why a Watering Schedule Usually Backfires
Many people start with a fixed rule, such as watering every Sunday.
It feels organized, but plants do not follow the calendar.
How fast a pot dries out depends on the plant, the size of the pot, the type of potting mix, the temperature of the room, the humidity in the air, and how much light the plant gets.
A pothos near a sunny window in July can dry out far faster than the same plant in a dim corner in January.
The University of Maryland Extension puts it plainly in its guide to watering indoor plants: plants should be watered when they need it, not on a schedule.
The extension notes that a large share of houseplants are lost to overwatering and underwatering, which is exactly what a rigid schedule tends to cause.
So instead of a calendar, you will use a check.
Checking takes a few seconds, and it quickly becomes a calm habit.
Step 1: Read the Plant Before You Read the Soil
Start by simply looking.
A plant that is too dry often wilts and its leaves can take on a dull, grayish-green tone.
A plant that is too wet may drop leaves or turn yellow. These signals are not perfect, because some plants wilt both when they are thirsty and when their roots are sitting in soggy soil, but they tell you where to look next.
Take a moment to notice the normal look of each plant when it is healthy.
A quick photo on your phone helps. When something changes, you will see it sooner.
Step 2: Do the Finger Test
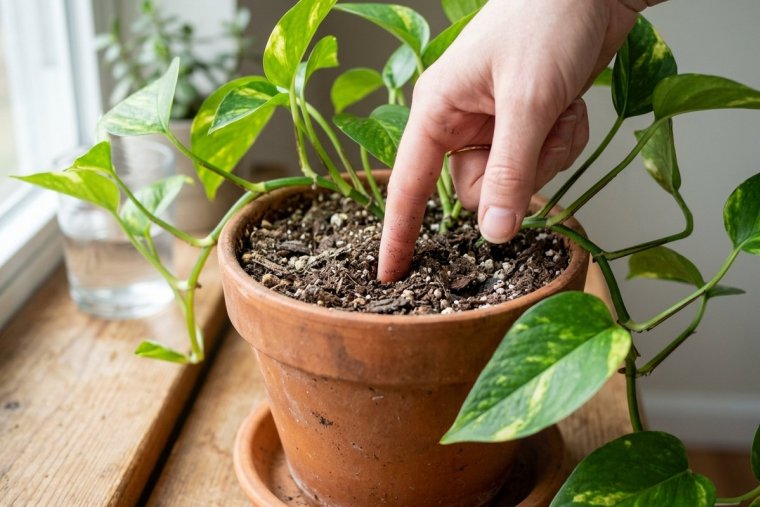
The simplest and most reliable home test is to push one finger into the potting mix to a depth of about two inches.
If the mix feels dry at that depth, most common houseplants are ready for water.
If it still feels cool and damp, wait and check again in a day or two.
There are exceptions.
Succulents and cacti need much less water and are usually allowed to dry out more deeply between waterings.
Moisture-loving plants such as ferns generally prefer that the surface never dries completely.
When you bring a new plant home, look up its basic needs once, and then let the finger test guide you day to day.
While your finger is in the pot, pay attention to how the mix feels.
If you cannot push your finger two inches down, the mix may be too dense, or the plant may be root bound and ready for a bigger pot.
Step 3: Try the Lift Test for Extra Confidence
For small and medium pots, there is a second check that is surprisingly accurate.
Right after you water a plant, lift the pot and notice how heavy it feels.
A few days later, lift it again.
A pot with dry mix weighs noticeably less than one with plenty of water in it.
After a few weeks, you will be able to tell by weight alone whether a plant needs water.
This is especially helpful for hanging plants and for pots that are hard to reach with a finger.
Step 4: Water Thoroughly, Then Let It Drain
When the plant is ready, water it well.
The most common method is top watering: pour water slowly over the surface of the mix until it starts to run out of the drainage hole at the bottom.
Small plants can be carried to the sink, watered there, and returned to their spot once they stop dripping.
The key detail is what happens next.
Empty the saucer under the pot after the water has drained. A plant should never sit in standing water, because roots that stay wet for long periods cannot get the air they need.
Watering a little bit every day is not a gentler option.
Small sips wet only the top layer of the mix, while the roots lower in the pot stay dry.
A thorough watering followed by a proper dry-down gives roots both water and air.
Step 5: Use Bottom Watering When It Makes Sense
Bottom watering means setting the pot in a saucer or shallow tray of water and letting the mix draw the water up through the drainage hole.
It works well for plants with leaves that cover the soil, such as African violets, and for mixes that have dried out so much that water runs straight off the top.
Leave the pot in the water only until the surface of the mix feels moist, then lift it out and let any extra water drain away. Do not leave it soaking for hours.
Step 6: Flush Out Salt Buildup Every Few Months
Tap water and fertilizer both leave dissolved minerals behind in the pot.
Over time these soluble salts can build up and make it harder for the plant to take in water.
Signs include slow growth, brown leaf tips, lower leaves dropping, and a white or crusty ring on the soil surface, around the drainage hole, or on the outside of clay pots.
The University of Maryland Extension recommends leaching, or flushing, the mix with clear water every four to six months.
The routine is simple:
- If a white crust has formed on top of the mix, scrape it off gently first.
- Slowly pour plenty of water through the pot, at least twice the volume of the pot, and let it drain completely.
- Do this before you fertilize, not right after, so you do not wash away fresh fertilizer.
- If salts keep building up or the pot drains poorly, consider repotting into fresh mix.
The same source suggests avoiding softened water for houseplants, because it contains more dissolved minerals.
Rainwater or water left out overnight are easy alternatives many plant owners use.
Common Watering Mistakes and Calm Fixes
- Pots without drainage holes. Water collects at the bottom with nowhere to go. Use a nursery pot with holes inside a decorative cover pot, and empty the cover after watering.
- Watering because the surface looks dry. The top inch dries first. Always check two inches down before deciding.
- Treating every plant the same. A cactus and a fern on the same shelf need very different care. Group plants with similar needs so checking is quicker.
- Forgetting the seasons. Most plants use less water in the darker, cooler months. The finger test adjusts for this automatically.
- Panicking after one yellow leaf. An older leaf yellowing now and then is normal. Look for patterns before you change your routine.
A Note About Pets
If you share your home with cats or dogs, keep in mind that some popular houseplants can upset a pet's stomach or cause more serious problems if chewed. Before you add a new plant to a shelf your pet can reach, check it in the ASPCA toxic and non-toxic plants list.
It also helps to empty drainage saucers quickly, since pets sometimes drink from them.
Your Quick Weekly Check
Once or twice a week, walk past your plants with no watering can in hand.
Look at the leaves, do the finger test on each pot, and lift the small ones.
Only then fill the can for the plants that are actually ready.
This small pause is what turns watering from guesswork into a calm, reliable habit.
- Look: wilting, dull color, yellowing or dropped leaves.
- Feel: dry two inches down means water; damp means wait.
- Lift: light pot means water; heavy pot means wait.
- Water: slowly, until it drains from the bottom.
- Empty: never leave the pot sitting in water.
Give it a few weeks, and you will find you check your plants almost without thinking.
That is the goal: plants that thrive, and a routine that feels easy rather than stressful.
Sources and Further Reading
- University of Maryland Extension — Watering Indoor Plants: supports watering by need instead of schedule, the two-inch finger test, the lift test, top and bottom watering, emptying saucers, and leaching salts every four to six months.
- ASPCA Animal Poison Control — Toxic and Non-Toxic Plants: the reference for checking whether a houseplant is safe around cats and dogs.